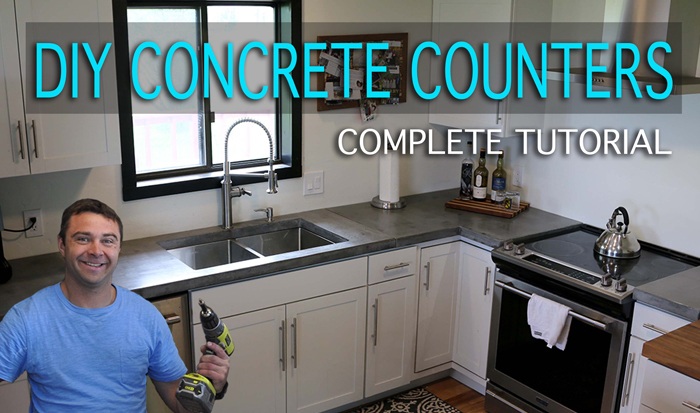
Concrete countertops offer a fully customized, handcrafted surface common in kitchens, bathrooms, outdoor areas, restaurants, and bars. Concrete counters combine elegance and versatility and are naturally durable and easy to clean and maintain.
Concrete countertops are all the rage these days, so I thought I'd create a tutorial to document how to make concrete countertops. I was a senior in college at the University of Nebraska – Lincoln in 2007 when I was introduced to concrete counters for the first time. I was watching the DIY network and they built a kitchen island. Once I saw this, I had to give it a try. Over the last 11 years I've built many counters / tables and love the unique look and feel of concrete. You are in the right place if you are interested in learning how to make concrete countertops for your home.
DIY Concrete Countertop Tutorial
In this tutorial, we'll walk through the process of how to make concrete countertops from A to Z. You'll learn how to plan for concrete counters, how to build the molds, how to mix and pour the concrete, how to seal concrete counters, how to install concrete counters, and how to install an under-mount sink in concrete countertops. I hope the tutorial will help and inspire you to try out a few concrete projects!
Gather Tools and Download Shopping List
Concrete counters are a great DIY project that will save you so much money with your kitchen remodel. You will need to invest in materials and perhaps a few new tools, but you'll still come in cheaper than hiring a professional. I had a local concrete concrete counter company quote me $85/square foot. My total counters came to 25 square feet. This would have come to $2,125. In contrast, I was able to build these counters for roughly $500.
Example of Costs:
Concrete mix: Qty 7 – $23/bag $161 total ( Quikrete Countertop Mix ) – Save $112 by using Quikrete 5000
Melamine: Qty 2 – $30/sheet – $60.00
100% Silicon Caulk: Qty 2 – $6/tube – $12.00
Concrete Coloring: Qty 7 – $6/bottle – $42.00
Portland Cement: Qty 1 – $9.00/small bag – $9.00
Polisher Rental if you do not own one: $50.00 – From Concrete Counter Institute
(Or use normal sander technique) – Video coming soon
Foam Pipe Insulation for sink faucet knockouts: $4.00 ( Or buy rubber knockouts on Amazon )
Pull down Koehler faucet with soap dispenser
Undermount sink I used: Franke Sink
Main tools needed for the DIY concrete countertop:
These are affiliate links. This means that if you end up purchasing a tool from Amazon, I'll be given a small kickback for referring you to their site. I really appreciate your clicks and purchases as they help support my ability to focus on making more projects to share!
Miter Saw
Drill
Table Saw
Circular Saw
Concrete Wet Polisher Kit with 5″ Polishing Pads
Respirator
Download the PDF Concrete Counter Cheat Sheet for the complete list of tools and shopping list. This will save you time, money, and energy with your next countertop project! Learn how to make concrete countertops as efficiently as possible.
How long does it take to make concrete counters?
Concrete counters can be completed within 7 days if the conditions are right. Building the molds will take between a couple hours to a full morning depending on the complexity of the counters. Pouring the counters will take about 2-4 hours. Once the concrete is poured, I recommend letting it sit for at least 48 hours before taking it out of the mold and flipping the counters. This will vary depending on the mix used, temperature/humidity, and additives in the concrete.
Once de-molded, let the concrete continue to cure for another 2 days to build up strength. Then polish the concrete and fill the voids. Seal, and install. Depending on your skill level and time to commit, I say 5-7 days because it is a conservative amount of time, and will give the concrete plenty of time to cure.
What are the advantages of concrete counters?
Concrete counters make a statement in any kitchen. They will instantly give your kitchen a high end look and feel. Concrete counters can be any shape, thickness, texture, and color. Building concrete counters is truly an art. You can embed fossils, crushed glass, metal designs, tiles, trivets, coins, bike chains, saw blades, and other hard items to customize them. Concrete counters have a very earthy and organic look to them. They can be made to look rustic and stone-like, or polished to fit a modern kitchen.
What are the disadvantages of concrete counters?
Concrete counters are porous similar to granite and marble. That means concrete counters can stain if acids, oils, or wine sits on the concrete long enough. This problem can be solved by staying on top of maintenance and making sure a good sealer is used, along with wax. Concrete counters will have character, and blemishes or voids can be noticeable. If perfect looking countertops are what you want, do not attempt building your own concrete counters. If you like the industrial look of countertops, or their rustic look, then concrete counters are something you will like.
Do concrete counters stain easily?
Concrete counters will stain if not properly sealed. I've used the Cheng concrete sealer for years and it is one of the most well known and popular brands. I use this sealer in combination with the Cheng Wax. The sealer does a descent job, but a wax is highly recommended as liquids will bead up when it touches the wax, and it will take a much longer time for the acid or oil to seep through the wax and actually stain your concrete. As long as you don't leave the acid or oil on too long, you'll be okay. Many folks look at some of the stains and say it adds a patina over time that adds to the character.
For my taste, stains bother me and I'd rather not have them. Which is why I'm going to be using Omega Sealer from ConcreteCounterTopInstitute.com. The reviews are amazing and I can't wait to try it out.
What is the best concrete countertop mix?
There are many brands of countertop mix to choose from. There are traditional mixes as well as more expensive mixes with special additives. GFRC ( glass fiber re-enforced concrete ) is also becoming more mainstream and DIY friendly. GFRC is more expensive typically and something you'll most likely need to order online or find at a local concrete supply store that specializes in decorative concrete. There are two mixes I consistently use. They are Quikrete 5000 and and the Quikrete Countertop mix.
What is the difference between Quikrete Countertop Mix and Quikrete 5000?
There are a few differences between the special Quikrete countertop mix and the standard Quikrete 5000. First is the price. Quikrete countertop mix is about $23.00 per bag and Quikrete 5000 is $6.50/bag. That is quite a big difference. Quikrete countertop mix has much smaller aggregate that is the size of sand. Quikrete 5000 has aggregate the size of pea gravel. The countertop mix has a plasticizer additive which makes it so you need less water to get a flowable mix. The less water used, the less shrinkage will occur.
I've found the countertop mix is easier to trowel and sand for beginners because of the smaller aggregate and creamy finish. It has a lot more cement in the mixture than Quikrete 5000 which is one of the reasons it has a creamier feel. The smaller aggregate is also nice because you won't have rock chip-outs on the edges, and an orbital sander can easily create beveled edges if you don't have a concrete polisher. The countertop mix is also supposed to require less vibrating to remove air voids, but I've found the two very similar.
Quikrete 5000 is an awesome mix!
The big disadvantage of the countertop mix is its working time. It sets up much faster which makes you need to work fast. It increases my stress levels a bit during the poor. As for durability, I've had outdoor kitchen counters made from Quikrete 5000 sitting in the elements the last 5 years. They still look great. I've had fewer stress fractures occur with Quikrete 5000 as well. So while I think the countertop mix is a bit easier for a beginner, I still prefer the Quikrete 5000 because I can get just as good or better results. That is my 2 cents.
Should I try making concrete counters or should I hire?
Concrete counters are an art that does take time and experience to get good at. I do not recommend building counters for your first concrete project. I highly recommend building a concrete table first, in order to learn some of the basics. Once you have a table or two under your belt, you'll have some priceless experience that will help tremendously with your first concrete counter project. Concrete counters are a lot of work, but the end results and money savings are well worth it in my opinion. Learning how to make concrete countertops is a skill that can come in handy for all sorts of future DIY home improvement projects.
Should I polish or sand concrete counters?
If you want to see the aggregate in the concrete counters then you'll want to polish the concrete. Polishing will expose the rock or items embedded in the concrete because it grinds off the cream surface. You'll need to polish the concrete if you want to expose crushed glass. Sanding counters will give you a finish with the natural creamy look of the concrete. You won't expose the aggregate with a 200 grit pad and it is much quicker and in my opinion easier to get a nice looking finish by a beginner.
With wet polishing, you can get a higher gloss finish and can bevel edges etc with ease. I wanted to show the wet polishing process in this video, but I've had great results with sanding using an orbital sander. In fact, I recently did a set of outdoor concrete counters using the orbital sander method and and was thrilled with the results.
Steps about How to make a DIY concrete countertops
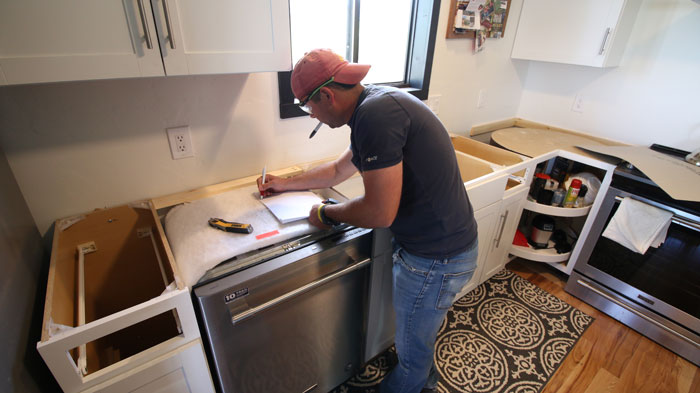
Measure and determine layout
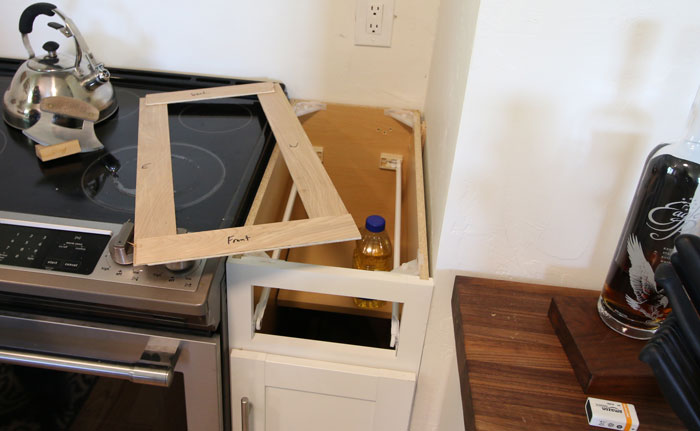
Start by figuring out the layout and measurements for your counters. Use a tape measure for this process. If your walls are not square or if you have an intricate layout, then it can help to use a template.Remember that when you pour concrete counters using the reverse cast technique, that you'll have to build the molds in a mirrored fashion. Sometimes having the template can help make this process easier to ensure the counters are built correctly. Label the template sides with a marker. I cut two inch wide strips of 1/4 inch plywood. A hot glue gun works well for attaching the template pieces.
Build concrete counter mold
Transfer your measurements to the melamine. If you are adding a sink, you'll want to draw around the template that came with the sink. I used a Franke Undermount sink from Amazon. It came with a nice template, but it had a lip on one side with only 1 knockout hole pre-drilled. I'd recommend getting a sink without a lip so that you don't have to try and make a knockout hole because it is a pain in the neck. If you do have to drill drill a hole through a sink, you'll need a step bit to help with the process. I'd get a sink like this one next time.
Trace around the template with a pencil. Make sure it is centered and exactly where you'll wan the sink to be.

I use either a table saw or a circular saw to cut the melamine. Cut as straight as possible. Set up a straight edge or fence if you need to. A table saw is the best way to make the cuts. A straight edge is very helpful if you have one.

Cut the sides for the concrete counter molds on a table saw. For 2 inch thick countertops, cut the strips to 2 3/4 inches in width. The extra 3/4 of an inch connects to the base portion of the mold.

Attach the sides of the mold using 1 5/8 inch long drywall screws. Make sure to pre-drill . Hold the drill as level as possible to ensure it goes into the center of the base piece of the mold.

Build the sink knockout
Trace around the template onto a sheet of high density foam.

Cut the foam. A band saw or scroll saw is a good method for doing this. A jigsaw will also work, but getting the larger cuts perfectly straight is a bit harder. You need to be very careful when cutting foam. Keeping the larger side against the fence will help get you the straightest cut.

Round the corners as needed. A belt sander can help with this process if you are not able to cut the corners with a scroll saw or jigsaw. Work slowly with this process and take a little off at a time.
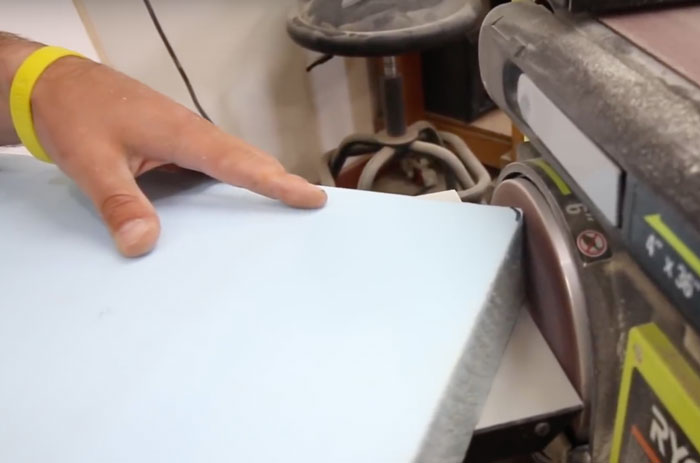
A round over bit on a router does a really good job creating the corners. I prefer this method if you can find a bit that matches up with your corner. Do clamp down the foam.

A light sanding with a drywall screen can help remove any bumpy areas. Again, do this very lightly.

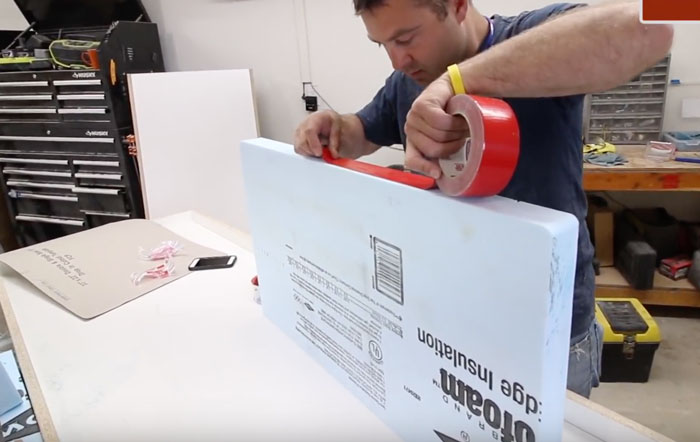
Seal the foam using tape. I like to use stucco tape because it has a smooth finish and adheres nicely.
Cut Reinforcement
Use a bolt cutter to cut the reinforcement to size. I like to have about an inch of space between the perimeter of the reinforcement and the sidewalls of the concrete mold. I use this type of mesh which is available at Home Depot or your local supplier.

For 2 inch slabs, I like to use 3/8 inch rebar for additional reinforcement. This is especially important when doing counters with a sink knockout because it will help minimize the chance of cracking.

Attach the re-bar to the existing frame. I like to use zip ties because it is super quick and easy, but metal wire works well.
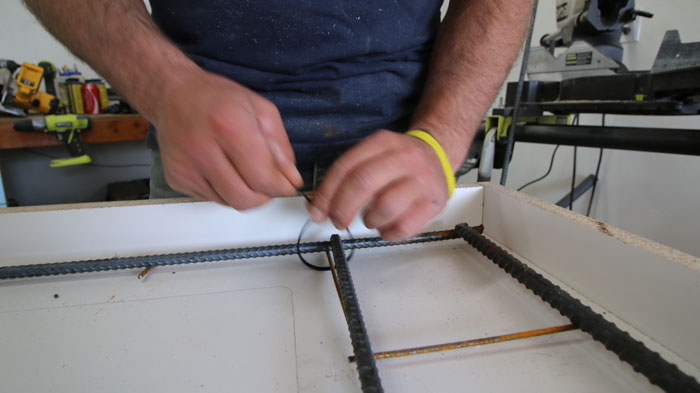
Here is a look at the reinforcement in place and test fit in each mold.

Use silicon to attach the sink knockout to the bottom of the mold.

Seal the mold
The next step is to caulk the seems. In this tutorial I tape the seams on each side. Another method I've recently learned about is to use a cake fondant tool to create the perfect caulk bevel. This technique works great and eliminates the need to tape. You basically run a beat of caulk, then use the fondant tool ( which is basically a ball bearing on a metal stick ) to round over the bead. You'll let the caulk dry. The ball pushes the excess to each side, so you can simply peel off the excess once dry.

I used pipe insulation to create the faucet and soap dispenser knockouts. Check the stem length of your faucets to make sure it is long enough to get through your counter. If needed, you can do a larger ring like I did under the smaller ring. This way the nut can be tightened and secured if you have a shorter faucet stem. I did not need to do this, but I wanted to show the process just in case. I would definitely recommend ordering this re-usable rubber faucet knockout kit to make the process even easier.
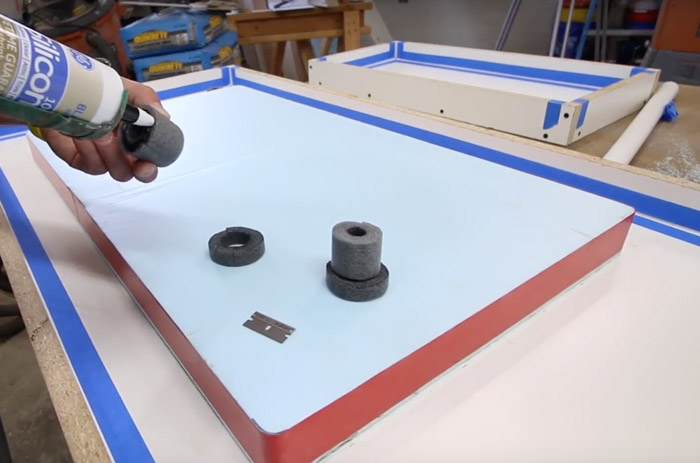
If you choose to use the tape method, round the silicon with your index finger. Dip your finger in water to help the bead of silicon go on very smoothly.
![]()
Remove the tape while the silicon is still wet.

Caulk around the sink. Tap as needed. I used a caulk tool for this, but a cake fondant tool would work even better.
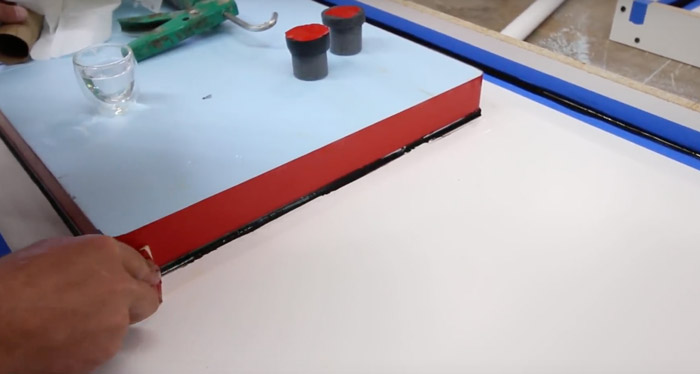
Remove excess caulk from the mold. Use a razor blade. Rubbing alcohol and a clean microfiber rag work great too.
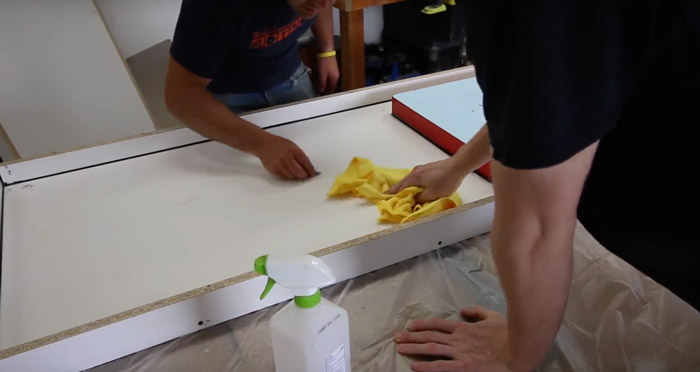
Silicon the faucet knockouts in place. I centered the faucet hole and made sure it lined up with the pre-cut hole in the metal sink. Add additional knockouts for soap dispensers etc. Let the caulk dry for a couple hours prior to pouring concrete.

Mix concrete
The next step is to mix the concrete. Do this according to the manufacturers recommendations. I used Quikrete Countertop mix for this project. I mixed it to about the consistency of oatmeal. You can either mix by hand or with an electric concrete mixer. I actually prefer to mix by hand because I don't have to clean out the big mixer when done, but a mixer can make the process a little less labor intense. Mixers can be rented from a tool rental business.
Coloring can be added during the mixing process if you'd like. I like to mix 1-2 bags of concrete at a time. One downside of the special Quikrete countertop mix is that it sets up fairly quickly. This means you need to work rather quickly. The cheaper Quikrete 5000 has quite a bit more working time in my experience.

Fill the molds with concrete
Add concrete to the molds. Transfer the concrete from the mixing tub or mixer using a couple gallon bucket. Wear rubber gloves to put the concrete in the mold.

Spread the concrete around the mold evenly. Fill the mold a little over half way full. once the first half of concrete is in, vibrate the concrete as best as possible by lifting your work surface up and down rapidly. You can also use a concrete vibrating tool or rubber mallet to tap the sides of the mold. Vibrating the concrete helps remove air pockets from the concrete. Take the time to do a good job with this process.
Let the concrete firm up slightly before adding the reinforcement. This will prevent it from sinking. I tend to do the majority of the concrete vibrating before adding the reinforcement. I only tap the sides after adding the reinforcement. This helps prevent shadowing from the reinforcement.
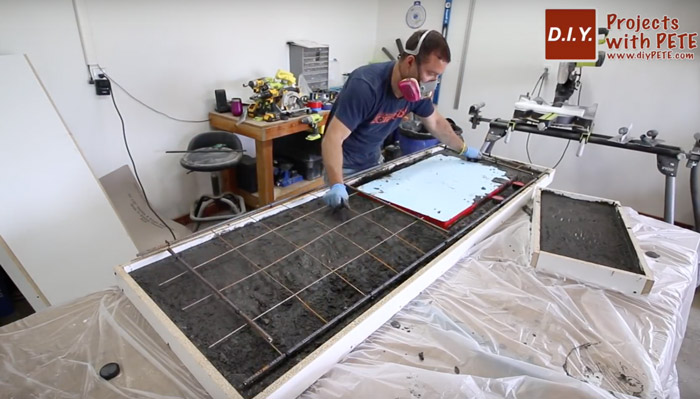
Add reinforcement
Add the reinforcement to the mold. Bend the wire as needed to help flatten any bent wire. Then mix of a batch of concrete that will go around the sink. Add glass fiber reinforcement fibers into the concrete for around the sink area to help give it additional strength and to prevent cracking. Don't let any of the fiber reinforced concrete touch against the sidewalls or bottom of the mold. If you do, you'll most likely see fibers in the finished piece. Fibers on the top of the mold ( which will be the bottom of the counters ) is perfectly fine since you'll never see them.

One the mold is full, use a straight board to screed the concrete. This will level the concrete. Add additional concrete in low spots. Use a trowel to smooth the concrete once it has been leveled.
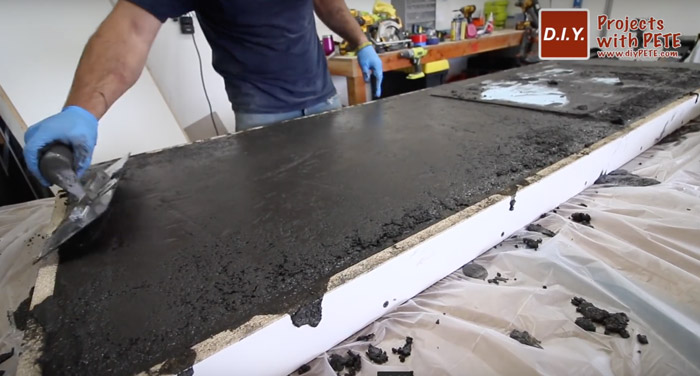
Tap the sides with a rubber mallet to help get additional air bubbles out of the concrete.

Once the concrete has been leveled and vibrated, double check that your tables are all level. This will ensure your countertops are level and not thicker in one corner or side. You can add shims under the wheels or table legs. At this point, you can either cover the countertops with plastic and start letting them cure, or you can do the hard troweling technique to make them smooth prior to polishing.
I personally like to let the concrete set up for a while ( usually at least a few hours ). I'll then trowel the concrete at different stages as it dries to make everything extra smooth. This isn't 100% necessary since it is the bottom side, but I always like to practice my hard troweling skills for the times that I do pour in place countertops. It also is nice to have a more finished feeling underside that will require less polishing.
Time to cure!
Once you are happy with the underside, go ahead and cover them with plastic to help the countertops cure slowly and evenly. Then clean up your tools and have a cold beverage. Job well done! Let the concrete countertops cure for a minimum of 48 hours before removing the sidewalls. This will very depending on the mix you use.

Unscrew the side walls and then slowly pull them away. A chisel or flat screwdriver works well for prying the sidewalls. Make sure to only pry against wood. Prying against concrete will chip it.

Allow the concrete plenty of time to cure, especially if you have a sink. You want the concrete to be super strong to ensure you don't have cracking issues. I like to wait about 4 days to flip them. During this time, you can hydrate the concrete with a spray bottle and water. This isn't 100% necessary, but will help strengthen the concrete.
After 4-5 days, Slowly flip the concrete. Space foam evenly underneath to support everything. Place rags on the table that will protect the side of the concrete while it is being flipped. Let the concrete dry about 1 more day prior to polishing. The longer you wait, the higher the PSI will be. This means it will polish up nice!
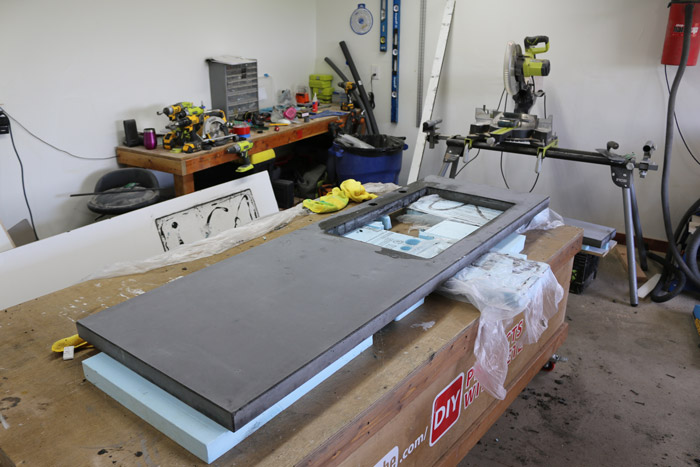
Polish the concrete
You can either wet polish or dry sand the concrete. Most professionals use the wet polishing technique, but I've honestly had amazing results dry sanding as well. In today's tutorial I'll be showing the wet polishing technique. I polish the undersides with a 400 grit pad. A 200 grit pad can be used if you have a real uneven underside. You don't need to polish the entire underside, but at least go around the undersides near the sink, and around the underside fronts where someone might run their fingers. This gives it a professional touch. Don't spend too much time on the undersides since you'll never really see them.

Flip the countertops right side up. I started with an 800 grit pad. Anything about 400 grit is more of a polishing pad that will take off very little material. Under 400 grit is more of a grinding pad. It will expose aggregate and remove material much quicker. I didn't want to expose the aggregate, which is why I started with the 800.
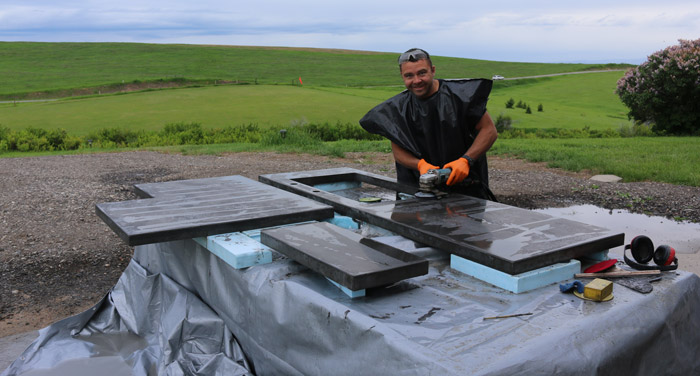
Here is a look at a concrete polisher and some of the supplies for the process. Here is a great concrete polishing kit that includes a wet polisher and 5 inch polishing pads. If you are going to be building more counters, it would be a worthwhile tool investment to look into.
 I use hand pads and scotch pads to polish the hard to reach sink areas. You can use the wet polisher for most of the side, but not the inside corners.

Once the first round of polishing is complete, squeegee the excess water and let it dry up for a bit. Then fill in the voids with a slurry mixture. Mix cement with acrylic fortifier or water. Acrylic fortifier can be found in the concrete section at Home Depot and it helps the paste bind better. If you have larger voids, you can mix a little sand in so the slurry blends in better and has more structure. Remove excess paste with a plastic putty knife and by rubbing the dry mixture with your hands. Let this set up, then do a final polish with either 800 or a higher pad.

Fill Voids
After the final polishing, there will still be smaller voids. Fill in remaining voids with the slurry paste. Wipe away excess with and use a blue scotch pad to lightly go over and clean the surface. No need to polish, just make sure all the excess slurry is removed.

Seal concrete
Wipe the concrete with water to make sure all the haze or excess slurry is removed. Next, seal the countertops. I used Tuff Duck Concrete Countertop Sealer for this project. I've used Cheng Concrete Countertop Sealer on a number of projects as well. I've heard great things about Omega Concrete Countertop Sealer being a really amazing sealer, so check that one out and see what is the best fit for your situation.

Beef up cabinets
You may want to beef up the cabinets a bit to prepare them for the concrete. I used 3/4 inch plywood and secured it in place using pocket holes. This strengthened the cabinets and provided more surface area for the concrete to rest on. It is also a flat surface to put caulk on which will hold the counters in place.

Install Sink
I am using an under-mount sink for today's project. I built a lip for the sink to rest on using 3/4 inch plywood. There are many ways to install sinks, but I like this method because it doesn't involve drilling into the concrete or using clips. The lip is about an 1/8 of an inch lower than the top of the cabinets. This way, the will rest perfectly flush with the top of the cabinets.

Run a bead of clear silicon around the support lip.
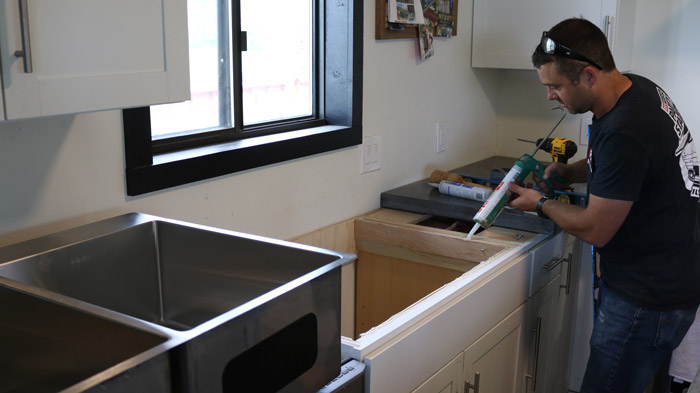
Place the sink in the hole. 
You can see the sink support is slightly lower as mentioned above. The metal now sits flush with the top of the cabinets.

Install countertops
Add silicon to the top surfaces of the cabinets to hold the concrete in place. Then, find some strong friends to help you lift and install the slabs. You might want to entice them with free pizza and cold beverages.
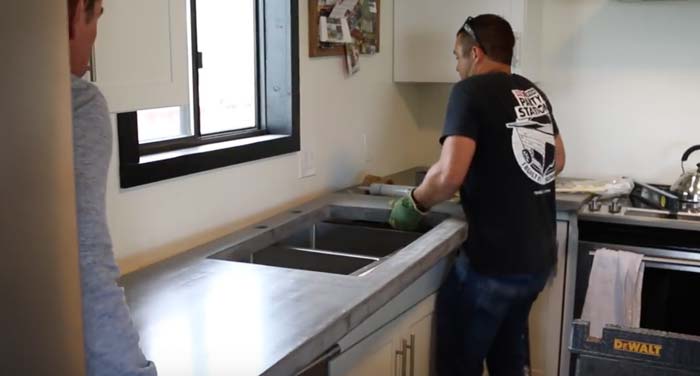
Line the concrete counter up with the sink and faucet holes. Next, level the concrete as needed. Shims and additional silicon can be used.
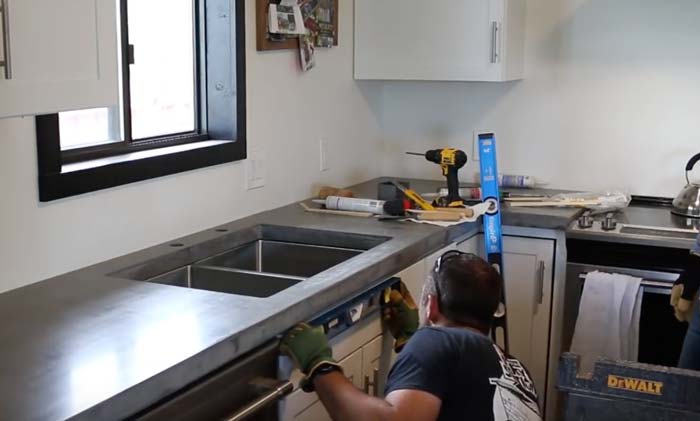
Install Faucets and hardware
Install the faucets and hardware. If you aren't into the plumbing thing, hire a plumber to help. I found a Koehler pull down faucet that I really like. It came with a soap dispenser too. I'd highly recommend this faucet, especially for a big dual basin sink like this!
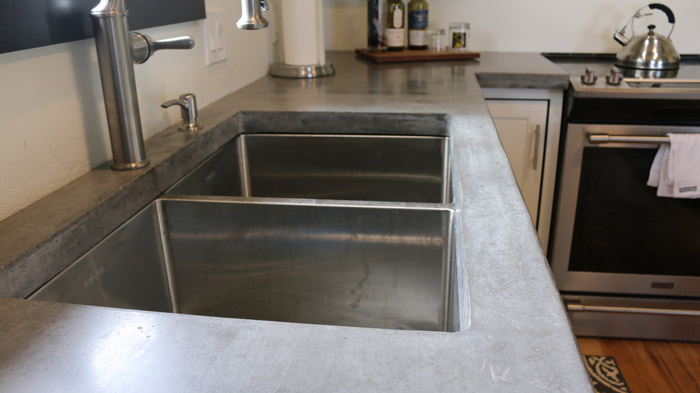
Caulk the seam between the counter and sink. Use clear silicon.

I mixed grey pigment in white silicon to get a silicon to match the concrete. I taped off both sides and then removed the tape. Some folks prefer to use epoxy and to hide the seams as much as possible. Since this is concrete, I really like the industrial look and so the seams are not a big deal to me.
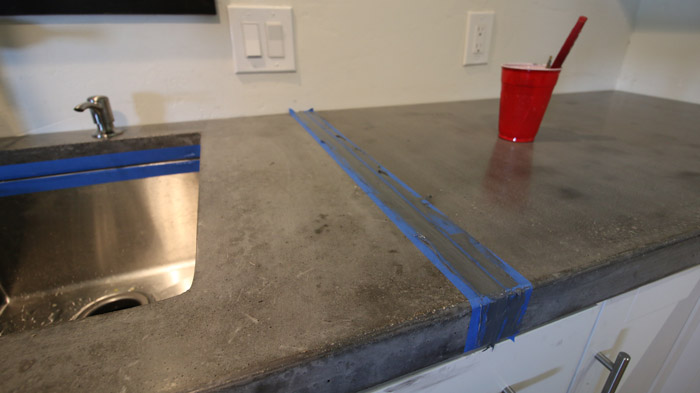
Wax your countertop with a good concrete countertop wax. Enjoy your new countertops! Please comment below with questions or with photos showing off your concrete counter project! Please like and share if you found this helpful! For all sorts of other concrete projects on my website check them out here! I hope this tutorial has helped you learn more about how to make concrete countertops for your home. Cheers from Montana! – Pete


